

Tips to Improving your Cell Phone Photography


Tips to Improving your Cell Phone Photography

Improving your cell phone photography
Let me start out by saying, I am not an expert at cell phone photography. I can, however, give you some tips to help you to take better photos with your cell phone! Many of the same guidelines that apply to traditional photography, also apply to cell phone photography. So here are my top 10 tips for taking better photographs with your cell phone.
1.Try to get the image correct in-camera
What I mean by this is aim to have the correct exposure, and frame the photo correctly. It is much more difficult to save an image from under or over exposure with a cell phone as the images are not as high quality as with a professional camera. This also applies to cropping an image. The more that you crop your image in post-editing, the more grainy and low-quality it will be.

2. Use natural light
Whether you are indoors or outdoors, lighting is the most essential tool in photography. With cell phones, the only flash that you have is a direct, on camera flash which is not the most flattering light.
When indoors, window light is ideal. An alternative to this is opening up a door and using the light that creates. Turn off all of the other lights in the house as mixed lighting can cause color casts that is not flattering. Facing your subject towards the light allows for beautiful and evenly lit subjects. Placing the light behind your subject can create a beautiful silhouette.
When outdoors, the ideal time to take images is during Golden Hour. Golden Hour is the an hour before sunset or the hour after sunrise and is the time of day when the sun is lower in the sky and the light is the softest. If you are not shooting during this time, find open shade. Open shade is when your subject is completely in the shade , but there is an area in front of them such as a field which allows enough light in so that the subject’s face is evenly lit.

3. Framing, composition, and the Rule of thirds in cell phone photography
Composition is an essential element of a good photo. There are many different aspects of composition that I will not get into, but there are a few key tips. If you go into the settings of your cell phone camera, you will see a section called “grid” or “grid lines”. Turn this on so that you can use it as a guide when taking your images.
We all know the traditional composition of center composition, but this grid allows you to apply the rule of thirds more easily to your images. The rule of thirds breaks down your images into thirds horizontally and vertically. The rule suggests that, by placing your subject, or another focus point of your image at the cross points of this grid, it will be more appealing to the viewer. For a pulled-back image, this may mean placing a cross point on your subject. For a close up image, it may mean placing a cross point on your subject’s eye. Another rule of composition that I often apply is “filling the frame”. So try getting in close so that your frame is filled completely with your subject, while also applying the rule of thirds.
4. Be sure that you have set focus on your subject
Once you have composed your image, set focus on your subject. You can do this by using your finger to tap on the person or object that you want in focus. One rule of focusing is to use the closest eye of your subject as the focus point. If your subject moves, simply re-focus.

5. Shoot from different angles to change perspective
When photographing the same subject in the same setting, you want to be sure to get a variety of images. To do this, simply change your perspective! Try shooting from different angles. Shoot from above, and walk around your subject to get different angles. They may not all turn out, but you may get an image that you love!
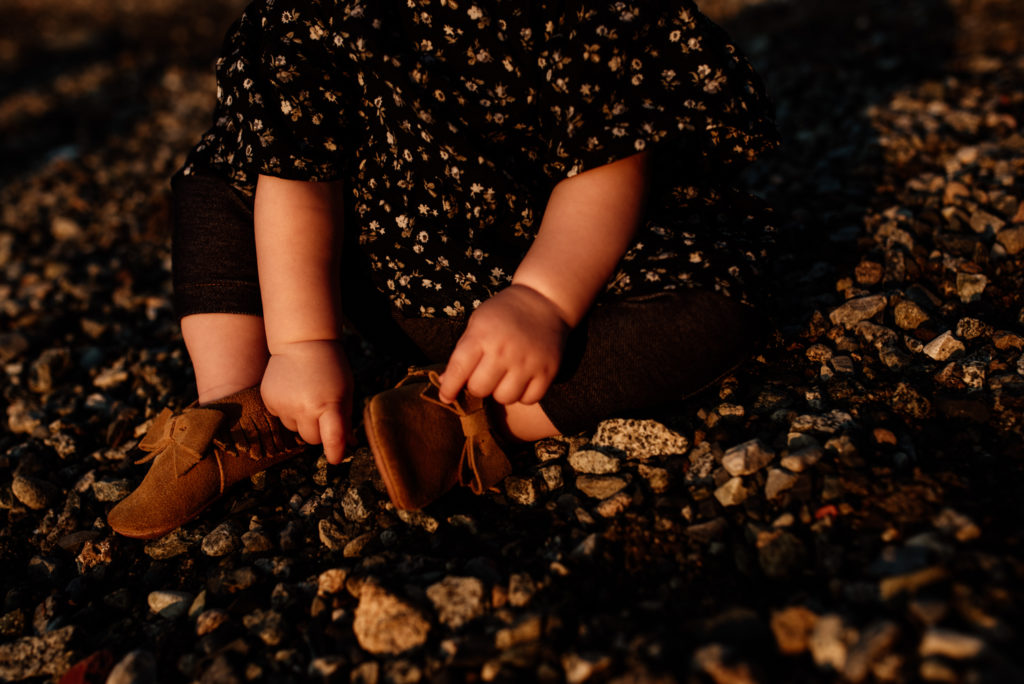
6. Don’t forget the details
Details are one of my favorite things to capture. The details help to tell a story. They also isolate beautiful moments such as a child grasping their mother’s necklace or playing with her hair. When shooting newborn images, I am always sure to capture their sweet features, tiny eyelashes, and little leg rolls. These are the things that we don’t want to forget.

7. “Posed” photos are not necessarily the best photos
If you can, try to capture the candid moments along with your traditional family shots. When I am doing a session, I often capture a few ‘posed’ images with everyone looking at the camera right in the beginning of the session. After that, I focus on connection and moments. If you are taking pictures of your family, encourage people to interact with each other, play games, tickle and snuggle!
8. Manual vs. auto settings in cell phone photography
Your cell phone camera does have the capability to shoot in a mostly manual mode. On my Samsung galaxy, this mode is called “Pro”. This allows you to adjust your ISO, shutter speed, and white balance (along with a few other options). I only recommend this if you are willing to put in a little bit of extra time learning about manual mode. You can, however, play around with some of the other settings such as selective focus which allows you to have a small area in focus and get a nice background blur!

9. Tools
There are so many gadgets such as lenses that you can add to your phone that are not necessary in my mind. The only tool that you might want to invest in is a tripod for your phone. This will allow you to set the timer on your camera and get the entire family in your photo. They are also small enough that you can use them to hold onto and steady yourself when taking a picture.
10. Mobile editing
Editing your image can take it to a whole new level. There are many different mobile editing apps that you can use, but I suggest Lightroom mobile. It is free to download, and there is so much that you can do within it. You can purchase presets that work with Lightroom, or you can use one of the presets that are already part of the app. I actually love the preset called “Modern 03”. There are presets for every style!
One of my favorite things about Lightroom mobile is the ability to do local adjustments. This means that you can choose the “selective” button, choose a brush, and focus an adjustment on just your subject, or just their face. This is great for when you want to keep your background a little bit darker, and only want to lighten your subject!
And that’s it! Those are my best tips on how to improve on your cell phone photography skills.
Need some inspiration?
If you need some photo inspiration, please check out my portfolio! If you are planning on taking your own newborn photos, be sure to check out my blog post here.
(Disclaimer, these are not cell phone images)

Leave a Reply
Flodesk
If you are looking to build an email list, Flodesk is the way to go! From beautiful email templates, to opt-in forms, and more, they make building and growing your email list easy!

get 50% off 12 months →
My fav tools & Resources
Dubsado
I use Dubsado to streamline my business, send invoices and contracts, and automate workflows for my business!

get 20% your first year →
Pictime
I use Pictime to deliver and host all my galleries. Their online store makes print sales easy, and the do video delivery!
")
Get a free month →

I am a wife, a friend, and a mother to my two beautiful boys; we have two playful pups named Charlie & Finnegan. We live in Victoria on Vancouver Island and love to explore the beautiful landscapes. Aside from photography, I am also a Registered Nurse. Every piece of my life has taught me that connection makes this world truly beautiful, and this belief inspires my work. I want to capture the raw connection and those real, messy imperfect moments in a beautifully artistic way. When we look back years from now, these images will evoke our emotions and remind us what that precious time in our lives truly felt like.


